CAD & Manual • Since 1998 • Dhaka, Bangladesh
Pattern Making Service — From Sketch to Production-Ready Garment Pattern
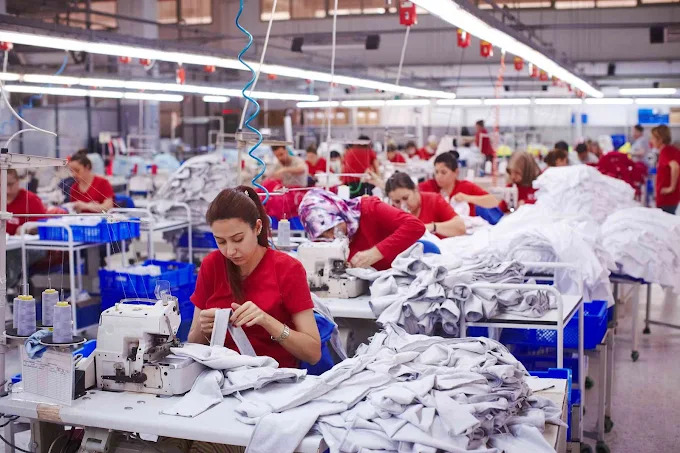
SDF Clothing provides professional garment pattern making services in Bangladesh. Our expert pattern makers transform your designs into accurate production patterns using both CAD and manual methods. From tech pack to pattern in 5 days for simple garments. We serve startup brands and established labels with precision patterns for all clothing types. Get your free pattern making quote today.
What Is Garment Pattern Making? — A Complete Explanation
Pattern making is the process of converting a two-dimensional design into flat pattern pieces that can be cut from fabric and sewn into a three-dimensional garment. Pattern makers translate design sketches and specifications into precise templates that guide fabric cutting and assembly. Each pattern piece represents a specific part of the garment—front, back, sleeves, collars, cuffs—and includes seam allowances, grain lines, notches, and other markings essential for accurate construction.
Accurate patterns are essential for quality production. Pattern errors compound during bulk manufacturing—a small error in one piece can affect fit, alignment, and overall garment appearance. Poorly drafted patterns cause fit issues, production delays, and increased material waste. Professional pattern making ensures garments fit as designed, assemble correctly, and maintain consistency across production runs. Patterns come after tech pack development—the tech pack specifies what the garment should be; the pattern defines how to construct it.
Pattern making requires specialized knowledge of garment construction, fabric behavior, and human anatomy. Pattern makers must understand how different fabrics drape and stretch, how seams affect fit, and how to translate design concepts into technical specifications. This expertise separates professional pattern making from amateur attempts. SDF's pattern makers have decades of combined experience across all garment categories, ensuring your patterns are production-ready from the start.
CAD Pattern Making vs Manual Pattern Making
Pattern making can be performed using computer-aided design (CAD) software or traditional manual methods. Each approach has advantages depending on project requirements, complexity, and intended use. Understanding the differences helps you choose the right method for your needs.
CAD Pattern Making
CAD pattern making uses specialized software like Gerber Accumark, Lectra Modaris, Optitex, or Adobe Illustrator to create digital patterns. CAD offers precision to within millimeters, easy modification and revision, and instant grading across size ranges. Digital files can be emailed globally, enabling remote collaboration with manufacturers. CAD patterns are easily archived and retrieved for future use. Modern CAD systems integrate with marker making software for optimal fabric utilization. CAD is ideal for brands requiring multiple sizes, frequent revisions, or working with remote manufacturers.
Manual Pattern Making
Manual pattern making uses traditional tools—pattern paper, pencils, rulers, curves, and drafting tables—to create physical patterns by hand. Manual methods are more intuitive for complex designs and draping, allowing pattern makers to feel and manipulate fabric directly on the dress form. Manual pattern making is often preferred for haute couture, custom fitted garments, and designs with complex draping or sculptural elements. Manual patterns can be digitized later for production use. Some manufacturers still prefer physical patterns, especially in smaller facilities.
| Factor | CAD Pattern Making | Manual Pattern Making |
|---|---|---|
| Precision | High—millimeter accuracy | Moderate—depends on skill |
| Speed | Fast once created, easy revisions | Slower, revisions require redrawing |
| Cost | Higher initial software investment | Lower tool cost, higher labor |
| Grading Ease | Instant automatic grading | Manual grading, time-consuming |
| File Format | Digital (DXF, AI, PDF, CAD native) | Physical paper, requires digitizing |
| Best For | Production, multiple sizes, revisions | Couture, draping, complex sculptural designs |
SDF Clothing offers both CAD and manual pattern making. We recommend CAD for most production applications due to precision, grading efficiency, and manufacturer compatibility. We use manual methods for initial development of complex designs, then digitize for production. This hybrid approach combines the intuition of manual drafting with the precision and efficiency of CAD. Your specific requirements determine which method we prioritize. Learn more about our Bangladesh clothing manufacturing capabilities and quality certifications.
The Pattern Making Process — Step by Step
Professional pattern making follows a systematic process from design concept to production-ready pattern. Understanding these steps helps you manage expectations and ensure accurate results. Here's the complete pattern development workflow.
Design and Tech Pack Review
The process begins with thorough review of your design specifications. If you have a tech pack, we analyze measurements, materials, construction details, and design requirements. If you lack a tech pack, we can develop one for you. Clear specifications are essential for accurate pattern development. We discuss any ambiguities and confirm understanding before proceeding. This step ensures the pattern will match your vision.
Block Pattern Selection
We select an appropriate block pattern as the starting point. Blocks are basic foundation patterns without design details—essentially templates for garment types (basic bodice, basic pant, basic sleeve). Using a proven block ensures accurate proportions and fit from the start. We may use standard industry blocks or develop custom blocks based on your specific fit requirements. Block selection is crucial for achieving the desired silhouette and fit.
Pattern Development and Adjustment
Using the selected block as foundation, we develop the pattern by modifying it to match your design specifications. This involves adding design details (pleats, darts, seams), adjusting measurements, incorporating style lines, and shaping pieces for the desired silhouette. We add seam allowances (typically 1-1.5cm), grain lines to indicate fabric direction, and notches for piece alignment. This step transforms the basic block into your specific design pattern.
Toile/Muslin Mock-up Fitting
Before finalizing the pattern, we create a test garment called a toile (UK) or muslin (US) from inexpensive fabric. This mock-up allows us to evaluate fit, proportion, and construction in three dimensions. You can try on the toile or we fit it on a dress form matching your target measurements. Based on fitting results, we make pattern adjustments—adding ease, correcting fit issues, refining proportions. This step ensures the final pattern produces the desired fit and appearance.
Final Pattern with Seam Allowances
After incorporating all corrections from the toile fitting, we finalize the pattern. This includes complete seam allowances, all notch markings for piece alignment, grain lines, pattern piece labels, and cutting instructions. The pattern is now production-ready. We provide the pattern in your required format—digital files (DXF, AI, PDF) or physical paper patterns. If grading is needed, we scale the pattern across all size ranges using appropriate grade rules. The final pattern is what manufacturers use to cut fabric for production.
Garment Grading — Scaling Patterns Across Sizes
Grading is the process of scaling a master pattern across multiple size ranges while maintaining proportional fit. A pattern created for size M must be graded to XS, S, L, XL, and other sizes. Grading ensures consistent fit across all sizes in your size range.
What Is Grading?
Grading applies mathematical grade rules to pattern measurements, increasing or decreasing dimensions systematically to create larger or smaller sizes. Grade rules specify how much each measurement point increases or decreases between sizes. For example, chest width might increase 4cm between M and L, while sleeve length increases 2cm. These rules maintain proportional relationships across the size range. Our grading service ensures accurate scaling with proper grade rules for your target market. Fit engineering may be required to establish optimal grade rules for your brand.
Size Standards by Region
Different regions use different sizing systems. US sizing runs smaller than EU sizing—a US M is approximately an EU S. UK sizing is similar to US but with different numbering. AU sizing follows UK conventions. When grading, we apply grade rules appropriate to your target market. We can grade to your custom size chart or standard regional sizing. Specify your target market when requesting grading to ensure appropriate size standards.
Size Chart Standards
Standard size charts exist for men, women, and children. Women's standard sizing typically includes even numbers (2, 4, 6, 8, etc.) in the US, or centimeter-based measurements in EU (34, 36, 38, etc.). Men's sizing often uses chest measurements in inches (S=36-38, M=38-40, L=40-42) or centimeters. Children's sizing uses age-based designations (2T, 4T, 6) or measurements. We can work with any size chart system or develop custom size charts based on your target customer measurements.
| Size | XS | S | M | L | XL | XXL |
|---|---|---|---|---|---|---|
| Chest | 78-82 | 82-86 | 86-90 | 90-94 | 94-98 | 98-102 |
| Waist | 60-64 | 64-68 | 68-72 | 72-76 | 76-80 | 80-84 |
| Hip | 86-90 | 90-94 | 94-98 | 98-102 | 102-106 | 106-110 |
| Shoulder | 36-37 | 37-38 | 38-39 | 39-40 | 40-41 | 41-42 |
| Sleeve | 57-58 | 58-59 | 59-60 | 60-61 | 61-62 | 62-63 |
Note: These are general standard measurements. Actual measurements vary by brand, fit preference, and target market. We develop custom grade rules based on your specific size chart and fit requirements.
Pattern Making for Different Garment Types
Different garment categories require specialized pattern making techniques. Understanding these category-specific considerations ensures patterns are optimized for each garment type.
Woven Garments
Woven garments including shirts, trousers, jackets, and dresses require precise dart placement to create shape and fit. Darts are folds of fabric stitched to create contour. Seam allowances are typically 1.5cm for woven fabrics to allow for finishing. Grain lines must be marked accurately—woven fabrics have distinct grain (warp and weft) that affects drape and hang. Pattern pieces for wovens include interfacing patterns for structure (collars, cuffs, waistbands). Ease allowances are minimal for fitted wovens, higher for relaxed styles. Pattern makers must account for fabric properties like stiffness and lack of stretch.
Knit Garments
Knit garments including t-shirts, hoodies, and activewear require different pattern considerations. Knit fabrics stretch, so patterns include negative ease—garments are cut smaller than body measurements, relying on stretch for fit. Ribbing at necklines and cuffs requires specific pattern treatments. Seam allowances for knits are typically 1cm or less to reduce bulk. Overlock or coverstitch seams affect seam allowance requirements. Pattern makers must consider fabric stretch percentage and recovery. Some knit patterns are cut on the bias for specific drape effects. Stretch factor must be calculated for each knit type.
Fitted Garments
Fitted garments including dresses, bodysuits, and tailored shirts require precise pattern making for close fit. Princess seams, vertical seams that shape the garment to the body, are common in fitted patterns. Multiple darts create shape at bust, waist, and hips. Ease is minimal—just enough for comfort and movement. Pattern pieces must align perfectly at seams to avoid distortion. Fitted patterns often require extensive toile fitting and adjustment. Pattern makers must understand body proportions and how garments interact with the body in motion. Sample development is crucial for fitted garments to verify fit before production. Our full package production includes pattern making as part of comprehensive manufacturing.
Structured Garments
Structured garments including jackets, coats, and blazers require complex pattern engineering. These garments include multiple layers—outer fabric, lining, interfacing, interlining—each requiring separate patterns. Collars and lapels need precise pattern drafting for proper roll and shape. Shoulder pads and structure elements require specific pattern accommodations. Pattern pieces for structured garments include seam allowances for different construction methods (felled seams, bound seams). Ventilation features like vents and slits require careful pattern planning. Pattern makers must understand garment construction sequences for structured garments.
Activewear and Performance
Activewear patterns require consideration of movement and performance. Four-way stretch fabrics need patterns designed for maximum range of motion. Panel placement affects muscle support and aesthetics. Flatlock seams require specific seam allowances. Compression garments need negative ease calculations based on compression levels. Pattern makers must understand how activewear performs during activity—patterns shouldn't restrict movement. Moisture-wicking properties may influence panel placement. Link to activewear product pages for performance garment considerations.
Common Pattern Making Mistakes That Cause Production Problems
Pattern making errors cause significant production problems. Understanding common mistakes helps you avoid them and ensure your patterns are production-ready. These mistakes occur in both professional and amateur pattern making.
Grain Line Errors
Grain lines indicate the direction fabric should be cut relative to the weave. Incorrect grain line placement causes fabric to pull off-grain during wear, creating扭曲 distortion and poor fit. Garments hang unevenly and twist around the body. Pattern pieces must be marked with accurate grain lines parallel to the warp (lengthwise grain) or weft (crosswise grain). Bias cutting requires grain lines marked at 45 degrees. Grain line errors are common in amateur patterns and cause significant fit and appearance issues. Professional pattern makers verify grain line placement for every piece.
Missing Notches
Notches are small markings on pattern edges that indicate where pieces should align during sewing. Missing or incorrect notches cause sewing operators to misalign pieces, resulting in uneven seams, mismatched patterns, and incorrect assembly. Notches are critical at seam intersections, darts, pleats, and any point where pieces must align precisely. Professional patterns include single notches for simple alignment, double notches for back pieces, and triple notches for specific orientation. Missing notches are a common cause of production errors and increased sewing time.
Incorrect Seam Allowances
Seam allowances are the extra fabric beyond the stitching line. Incorrect seam allowances cause seams to pucker, pull, or fail. Too narrow and seams may not have enough fabric for secure stitching. Too wide and seams become bulky and difficult to sew. Standard seam allowances vary by garment type and construction method—1cm for knits, 1.5cm for wovens, 2cm for enclosed seams. Pattern makers must apply consistent seam allowances and mark stitching lines clearly. Inconsistent seam allowances cause production confusion and quality issues.
Poor Ease Calculation
Ease is the difference between body measurement and garment measurement. Insufficient ease makes garments too tight and uncomfortable. Excessive ease makes garments sloppy and ill-fitting. Different garment types require different ease—negative ease for knits, minimal ease for fitted wovens, generous ease for relaxed styles. Ease must be calculated for each body point—bust, waist, hip, armscye, thigh. Pattern makers must understand target customer preferences and intended garment use when calculating ease. Poor ease calculation is a leading cause of fit complaints.
Not Accounting for Fabric Shrinkage
Many fabrics shrink during washing or dry cleaning. Patterns must include shrinkage allowance or finished garments will become smaller than intended. Cotton typically shrinks 3-5%, wool up to 5%, linen up to 10%. Pattern makers must either add shrinkage allowance to pattern pieces or specify pre-shrinking fabric before cutting. Not accounting for shrinkage causes garments to become too small after first wash. Use our shrinkage calculator to determine appropriate shrinkage allowances for your fabrics.
| Mistake | Effect on Garment | How to Prevent |
|---|---|---|
| Grain line errors | Fabric pulls off-grain, distortion, poor fit | Mark accurate grain lines, verify alignment |
| Missing notches | Misaligned pieces, uneven seams, assembly errors | Add notches at all alignment points, use standard notch codes |
| Incorrect seam allowances | Puckering, pulling, seam failure, bulk | Apply consistent allowances (1cm knit, 1.5cm woven), mark stitching lines |
| Poor ease calculation | Too tight or too loose, discomfort, poor fit | Calculate appropriate ease for garment type and use |
| Not accounting for shrinkage | Garments become too small after washing | Add shrinkage allowance or pre-shrink fabric, use shrinkage calculator |
| Incorrect measurements | Fit issues, size inconsistency | Verify measurements against tech pack, double-check all points |
Pattern Making Service FAQ
How long does pattern making take?
Pattern making typically takes 5-7 days from tech pack receipt for simple garments like t-shirts, tank tops, and basic pants. Complex garments like jackets, dresses with multiple components, or structured garments may take 7-14 days. If you don't have a tech pack, additional time (3-5 days) is needed for tech pack development before pattern making begins. Toile fitting and revisions add 3-5 days depending on the number of adjustments needed. SDF provides clear timeline commitments and communicates progress throughout the pattern development process. Rush service may be available at additional cost for urgent deadlines.
How much does garment pattern making cost?
Pattern making costs vary significantly by complexity. Basic patterns for simple garments like t-shirts typically cost $100-200 per style. Moderate complexity patterns for shirts, simple dresses, or pants cost $200-400 per style. Complex patterns for jackets, structured garments, or dresses with multiple components cost $300-600 per style. Grading to multiple sizes adds 50-100% of base pattern cost depending on size range. Pattern digitizing (converting manual to digital) costs $50-150 per style. SDF provides transparent pricing based on your specific requirements. Pattern costs are often credited against bulk production orders when you proceed with manufacturing.
Do I need patterns if I already have a tech pack?
Yes, tech packs and patterns serve different but complementary purposes. A tech pack is a specification document that describes the garment—measurements, materials, colors, construction details, stitching instructions. A pattern is the actual template used to cut fabric pieces that will be sewn into the garment. You need patterns to physically produce garments even with a complete tech pack. Tech packs guide pattern making by specifying what the garment should be; patterns enable production by defining exactly how to cut and assemble each piece. SDF can create production patterns from your existing tech pack.
What file format do you provide patterns in?
We provide patterns in multiple digital formats depending on your manufacturer's requirements. Common formats include DXF (compatible with most CAD systems), AI (Adobe Illustrator), PDF (universal format), and native CAD files like Gerber, Lectra, or Optitex. Physical paper patterns are also available for manufacturers who require traditional patterns. We ensure pattern files are compatible with your manufacturer's systems and can convert between formats as needed. Specify your required file format when requesting patterns. If unsure, we can recommend the most suitable format based on your intended manufacturer.
Can you grade patterns to my size chart?
Yes, we grade patterns to your custom size chart or standard sizing systems (US, EU, UK, AU). Grading scales the master pattern across all size ranges while maintaining proportional fit using mathematical grade rules. We can grade to any size specification you provide—whether it's a custom size chart based on your target customer measurements or standard regional sizing. Our grading service ensures accurate size scaling with proper grade rules for your target market. We can also develop custom size charts based on your customer data if needed. Learn more about garment grading principles in our detailed guide.
What is the difference between a block and a working pattern?
A block pattern is a basic foundation pattern without design details—essentially a template for a garment type. Examples include basic bodice block, basic pant block, basic sleeve block. Blocks provide the starting proportions and fit foundation. A working pattern is the final production pattern derived from the block, incorporating all specific design details, seam allowances, notch markings, grain lines, and labels. Working patterns are what manufacturers actually use to cut fabric. Block patterns are reusable starting points; working patterns are unique to each specific design. Professional pattern makers start with blocks, then develop working patterns for each design.
Can you make patterns from a physical garment sample?
Yes, we can create patterns from physical garment samples through reverse engineering. This process involves carefully deconstructing the garment, measuring each piece, and recreating the pattern. This is useful when you have a sample garment you want to reproduce without the original patterns—common for reproducing successful styles or creating variations of existing garments. Accuracy depends on garment condition, complexity, and whether the original sample was well-made. We recommend providing tech pack specifications alongside samples to clarify design intent and ensure accuracy. Reverse engineering typically takes 7-10 days depending on garment complexity.
How many pattern pieces does a typical garment have?
Pattern piece count varies significantly by garment complexity and construction. Simple t-shirts typically have 4-6 pieces: front, back, sleeves (2), neck binding, and optionally cuffs or hem bands. Basic pants have 4-6 pieces: front, back, waistband, and optionally pockets and fly pieces. Jackets may have 15-25 pieces including outer shell pieces, lining pieces, interfacing pieces, collars, cuffs, pockets, and various structural components. Complex dresses can have 10-20 pieces including bodice, skirt, sleeves, lining, and various design elements. Each piece requires accurate drafting, appropriate seam allowances, notch markings for alignment, and proper labeling for assembly.
Ready to Create Your Patterns?
SDF Clothing provides professional pattern making services with 25+ years of experience. From simple t-shirts to complex jackets, our expert pattern makers deliver accurate, production-ready patterns in 5-7 days. We offer both CAD and manual methods, grading, and sample development.
Get a free pattern making quote within 24 hours. Send your tech pack, sketches, or samples and we'll provide detailed pricing and timeline. Pattern costs are credited against bulk production orders.
Last updated: May 2026 • Average response time: 24 hours